


Observe ZDNET: Add us as a most well-liked supply on Google.
ZDNET’s key takeaways
- Cockpit provides a straightforward approach to handle digital machines.
- As soon as put in, this methodology is straightforward and versatile.
- Cockpit is free to make use of.
I lately wrote about my migration away from VirtualBox to KVM/Virt-Machine for my digital machine wants. I’ve discovered these instruments to be far superior (albeit with a bit extra of a studying curve) than VirtualBox.
Since then, nevertheless, I’ve discovered one other methodology of working with KVM (the Linux kernel digital machine know-how), one which not solely permits me to create and handle digital machines on my native laptop, but in addition from any machine on my LAN.
That instrument is Cockpit, which makes managing your Linux machines significantly simpler.
Additionally: The very best Linux distributions for newcomers: Skilled examined and reviewed
Cockpit may be put in on nearly any Linux distribution and has a digital machines plugin you possibly can add into the combo. With this plugin, you possibly can:
- Create new digital machines
- Import digital machines
- Begin digital machines
- View digital machines
- Insert disks right into a digital machine
- Add community interfaces to a digital machine
- And rather more
The Cockpit/Digital Machines mixture could be very highly effective and fairly helpful.
Let me present you how one can set up and use it.
Putting in Cockpit
What you will want: I will set up and run Cockpit on my primary Pop!_OS set up. You may set up Cockpit on different distros along with your default bundle supervisor (comparable to dnf and pacman). Apart from the Linux distro, you will additionally want a consumer with sudo privileges.
Let’s make this occur.
Set up Cockpit with the next command:
Present extra
sudo apt-get set up cockpit -y
Subsequent, set up the digital machines plugin with the command:
Present extra
sudo apt-get set up cockpit-machines -y
You possibly can additionally set up each of these packages with the one command:
sudo apt-get set up cockpit cockpit-machines -y
You are now able to rock.
Utilizing Cockpit for digital machines
After putting in Cockpit, you entry it from inside your net browser by pointing it to http://IP:9090 (the place IP is the IP tackle of the machine working Cockpit). Because it wasn’t put in with an SSL certificates, you will want to simply accept the “danger” and proceed. How this works will rely on the net browser you employ.
Additionally: 5 of my favourite Linux distros prepared to make use of out of the field – no setup required
No matter what browser you employ, you will must okay accessing the insecure web site.
Jack Wallen/ZDNET
For instance, if you happen to’re utilizing Chrome, you might click on Superior after which “Proceed to IP (unsafe)” the place IP is the IP tackle.
You may then be introduced with the Cockpit login display screen, the place you possibly can kind your Linux username and password to entry the system.
Login along with your normal consumer.
Jack Wallen/ZDNET
In the event you’re introduced with a button labeled “Activate administrative entry,” click on that and, when prompted, kind your username/password once more.
Additionally: My 11 favourite Linux distributions of all time, ranked
Within the left sidebar, you need to see an entry labeled “Digital machines.” Click on that, and also you’re able to handle your VMs.
As you possibly can see, I have already got some digital machines created.
Jack Wallen/ZDNET
Top-of-the-line issues about managing your VMs this fashion is that you may decide to have Cockpit obtain the mandatory ISO for the machine. To try this, click on Create VM. Within the ensuing window, give the VM a singular identify, depart “Set up kind” set to “Obtain an OS.”
I might recommend going with the native ISO choice for reliability.
Jack Wallen/ZDNET
From the “Working system” drop-down, choose the Linux distribution you need to use. The one caveat to this methodology is that a number of the distribution releases are outdated. In the event you do not discover the model (or distro) that you really want, choose Native Set up Media from the “Set up kind” drop-down, after which you possibly can find your ISO picture from the “Working system” drop-down.
Configure the remainder of your VM (storage, storage restrict, and reminiscence) after which click on “Create and run” on the backside of the pop-up. I did run into points with the obtain choice, the place it was unable to find the ISO picture. Due to that, I all the time obtain the ISO manually.
Additionally: 5 causes to modify to an immutable Linux distro in the present day – and which to attempt first
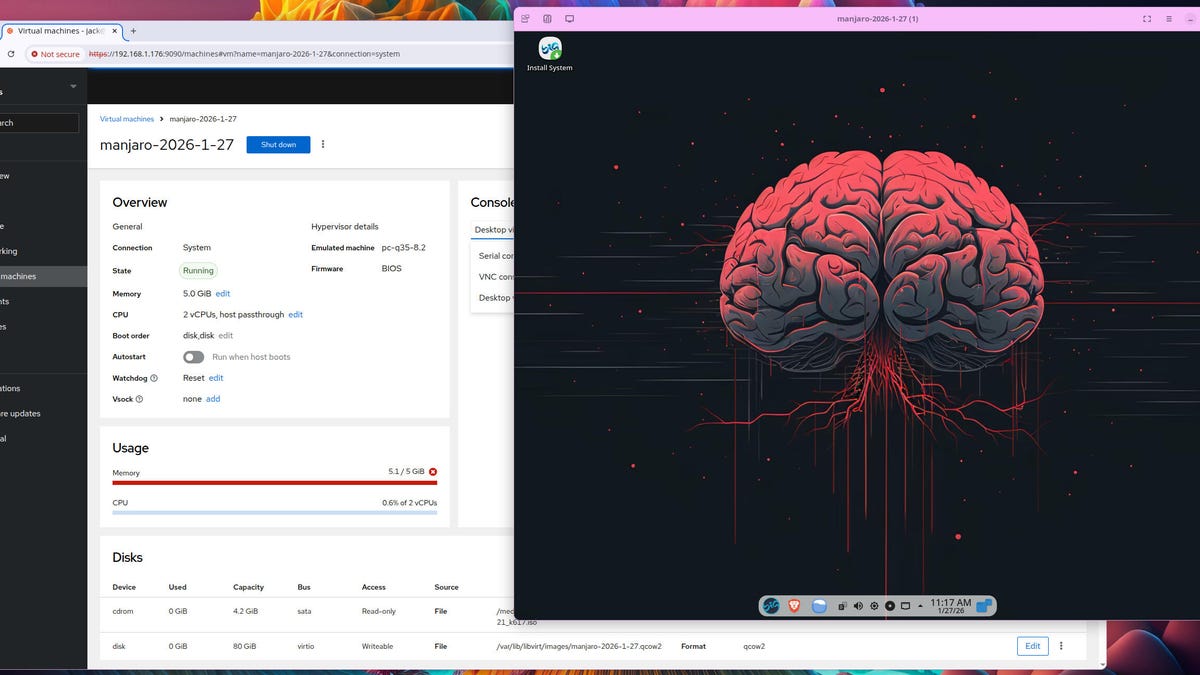
You may then choose to view the working VM by the use of the Desktop viewer, VNC console, or the Serial console. The VNC console runs the VM from inside the browser, and the Desktop viewer downloads a file, which, when you click on on it, will open the desktop viewer. Regardless of which viewer you select, you possibly can then stroll by means of the method of putting in the OS.
As soon as the set up is completed, reboot, and also you’re prepared to begin working along with your digital machine. You are able to do this from inside Cockpit and even return to your desktop and run it from inside Virt-Supervisor if you happen to like.


